Creating embedded Flash movies into DevalVR viewer
This tutorial shows how to create integrated interactive Flash movies into panoramas with DevalVR viewer.
You can see the final result of this tutorial here: Interactive video example
You can download this tutorial files here: interactive_video_example.zip (9.2 MB)
More
Flash examples here: Mouse events in 3D embedded
and 2D overlayer Flash
movies
Blending effects with 2D images
over panorama
DevalVR uses Flash movies (SWF files) to show
interactive content into panoramas.
The creation process step by step:
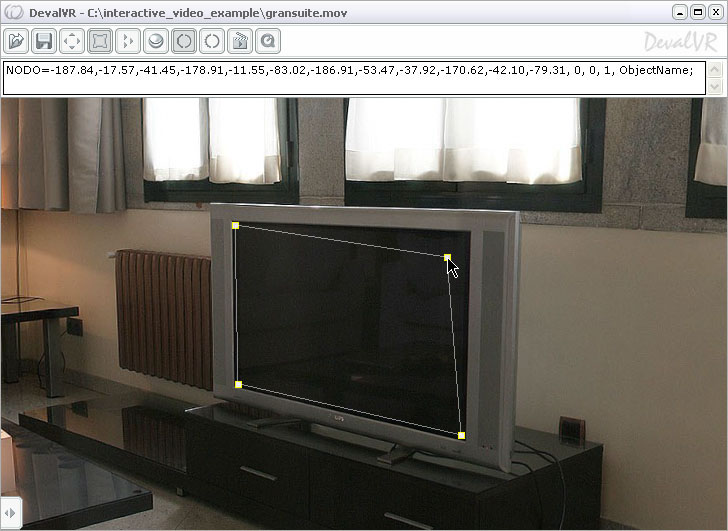
1.- Create movie area.
- Load your panorama file (QTVR or JPG format) into DevalVR player
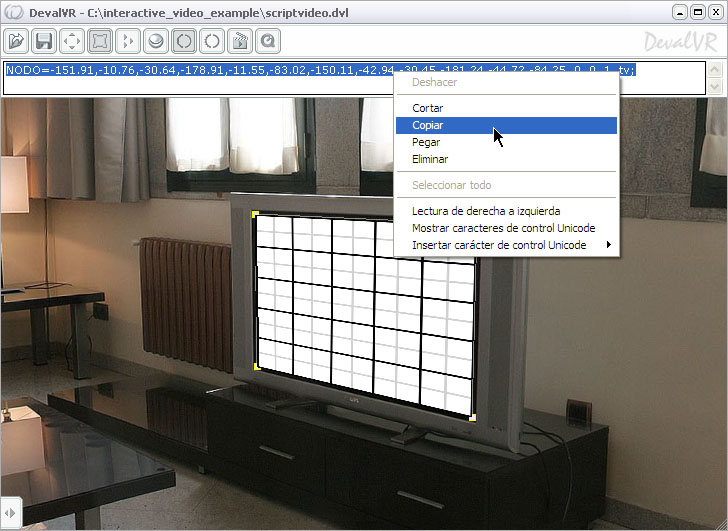
- Select NODO button  from tools bar
- A polygon with four vertex will appear. You can move this polygon to the left or to the right if you click into it and move the mouse cursor
- To change any vertex position, click in the vertex and drag the mouse
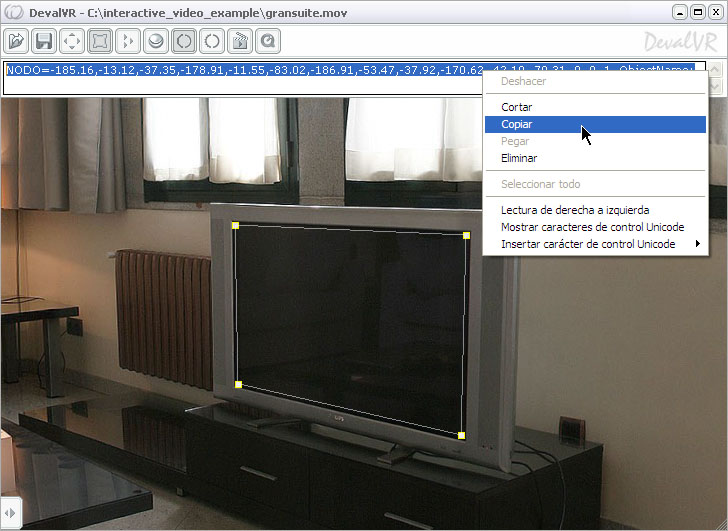
2.- Select NODO sentence.
- When the polygon is in the correct position, you can select all NODO sentence into text box. Click right mouse button on selected text and choose 'copy' option from context menu.
3.- Create the script file
You can read more about script programming here: scripts programming
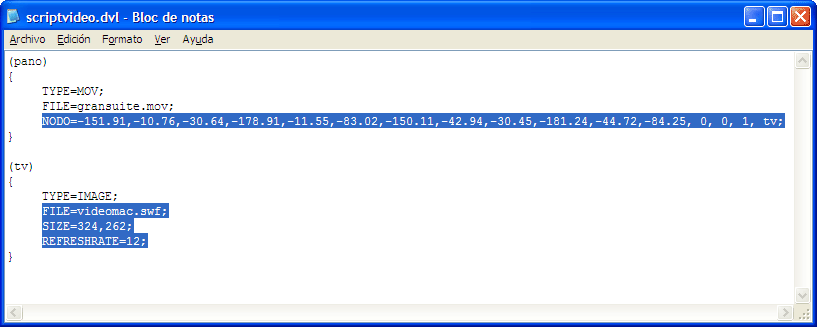
To create a basic video project, two script objects are required. The first object defines the panorama object and the second one defines the image loaded in NODO area.
- Create a new TXT file, rename it to .DVL and write the next code:
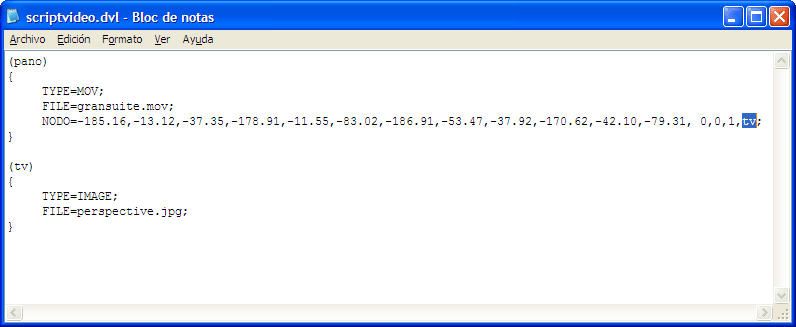
- Select "Paste" option from the "Edit" menu in your text editor to write your NODO line copied previously.
- Change the name at the end of NODO line. This name must be identical that the name of the object with TYPE= IMAGE statement ("tv" in this example)
- Write the name of your panorama in FILE statement of the first object (TYPE=MOV object)
- Write "perspective.jpg" in the FILE statement of IMAGE object. This image will appear in movie area and it's useful to configure the movie perspective. You can find this file in the tutorial ZIP file.
- Save the file
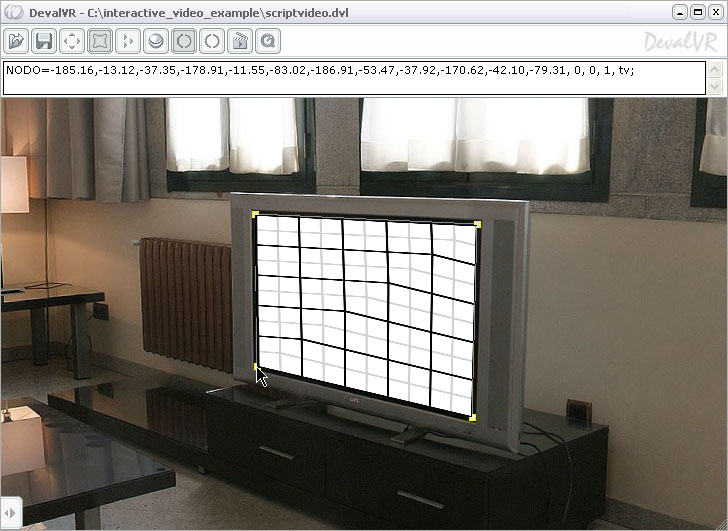
4.- Load script and change perspective
- Load the script file created previously. You can see the 'perspective.jpg' image into the movie area. This image appears deformed. This deformation depends of all vertex position.
-
Select NODO tool and press
ALT key while you drag the vertex UP and DOWN to change
the image perspective. You must change all vertex perspectives until the
image is showed without strange deformations.
NOTE: If you drag a vertex (remember with ALT key pressed) to UP, the vertex moves away from the camera, and if you drag a vertex DOWN, the vertex approaches the camera.
5.- Select new NODO sentence
- When the perspective is correct all lines of 'perspective.jpg' image must appear straight lines. Select the new NODO line from the text box.
6.- Edit script file
- Replace the new NODO line in your script.
- Replace the filename of IMAGE object by your Flash SWF filename, videomac.swf in this tutorial.
- Add SIZE instruction to IMAGE object. This values are the size of Flash movie. Make these values so small as it's possible to speed up the visualization experience.
- Add REFRESHRATE instruction to IMAGE object. This value is the number of times that DevalVR re-draws the movie image in one second. Make this value so small as it's possible to speed up the visualization experience.
7.- Work finished
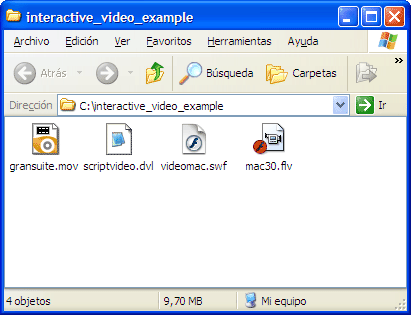
Now, you have four files in your project. The main file is the script file, you must load this file in the player or in a web page to view your video-project.
This is a sample code to load the project in a web page. You must write the script name in "src" parameter: